Section 2: Your First Motor
Running Your First Motor
Warning
Make ABSOLUTELY SURE that you are using a Talon SRX motor controller for this! If you try to run a different motor controller, it will fail. Ask a mentor/teacher for help determining whether or not a motor controller is a TalonSRX.
Firstly, we want to get into the main robot code. In your file tree on the left, first hit “src”, then “java”. You will see 4 files there, and 2 folders.

Open “Robot.java” by clicking on it. This file contains the main logic for the robot to run all of its code!
Before we create and run our motor, we need to install a “vendor dependency” for CTRE. Vendor dependencies are libraries developed not by WPILib, but by external “vendors”, who manufacture motor controllers, gyroscopes, etc. In this case, we are running a CTRE motor controller, so we need the CTRE vendor dependency.
Begin by opening the Command Palette again with Ctrl+Shift+P. Now type in “manage vendor libraries”. You should see the following:

Select it by pressing enter. Another menu should pop up. Hit “Install new libraries (offline)”. Select “CTRE Phoenix” and press enter. Select “Yes” to build.
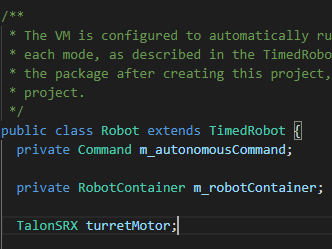
Now, we can begin creating our project! Still in Robot.java, begin by going to the line that says:
private RobotContainer m_robotContainer;
Put your cursor on the end of the line, and press Enter/Return twice. Now, we need to create our motor controller object.
In this case, we are creating a TalonSRX (our motor controller). We can call it anything we want; for the time being, let’s call it turretMotor. Thus, on our new line, we want to type:
TalonSRX turretMotor;
Note
When you type TalonSRX, a menu will pop up, with the variable name showing up first. Hit “enter” when you see this, and VSCode will automatically import the needed files to use the TalonSRX class.
Note
In Java and most other programming languages, at the end of each line (or “statement”), we use semicolons (;) to determine that this is the end of the line. Semicolons are NOT OPTIONAL! When you have an error in your code, ALWAYS check your semicolons first and foremost!
Note
In Java, almost all variables are named according to “camel case” notation. This specifies that the first “word” of the name is lowercase, and any subsequent “words” within the variable name have their first letters capitalized. There are exceptions, such as constants; these will be discussed later.
Your code should look like this:
Note
TODO: Should we use codeblocks or images? Codeblocks are a bit easier to maintain…
If your code looks like this, you’re good to move on. Scroll down until you see a “robotInit” function.
Note
teleopInit is the code that runs whenever you start the robot in “tele-operated” mode, shortened to “teleop”, where in a real robot, the drivers have control over it.
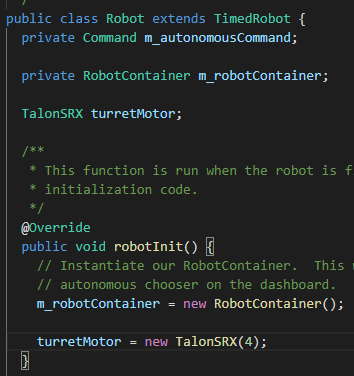
Set your cursor at the end of the line that says m_robotContainer = new RobotContainer();, and hit Enter twice. We now need to “assign” a value to our motor variable. Assignment is done through the = operator, i.e. variableName = someValue;.
With this in mind, to assign to our turretMotor object, we must create a new TalonSRX object. The TalonSRX constructor takes a single argument; the CAN ID of the motor controller. To determine the CAN ID… etc. Phoenix Tuner stuff
In this case, our CAN ID should be 4. Thus, to “instantiate” (i.e. create) the turretMotor, we use:
turretMotor = new TalonSRX(4);
Don’t forget the semicolon!
Your code should now look like this:
Now that we’ve created our motor, it’s time to run it! Scroll down until you find the teleopInit function. Inside of this function (below the autonomous command stuff), we need to “call” a method within the TalonSRX object.
In this case, the method is <TalonSRX>.set(). The set() method takes two parameters: the control mode (you’ll learn more about this later), and the “percent output”, a value from -1 to 1, determining how fast the motor should run (0 = stop, -1/1 = full speed), and which direction (>0 = forward, <0 = reverse).
Begin by making two blank lines after the autonomous command stuff. Then, we need to call the set() function, with our desired parameters. Begin by typing turretMotor.set. A menu should pop up, with the set method showing up, with all of its parameters. Press enter to input this in. Now, replace Mode with ControlMode.PercentOutput (ensuring to import ControlMode), and demand with our target speed. For safety and tutorial reasons, run it low, i.e. 0.2. In the end, your code should be:
turretMotor.set(ControlMode.PercentOutput, 0.2);
And will look like:

Now, you’ve created your code! It’s time to deploy and run it. First of all, we need to connect to the robot’s radio. Ensure the robot is turned on (you will see the orange light) and go to your Wi-Fi settings in the bottom right, selecting the radio (i.e. 4028_SNEED).
picture of radio in wifi tab
Now that we’re connected to the robot, it’s time to deploy the code. Go back to your code, and press Shift+F5. You may also need to press Fn.
You might get a message saying “Starting a Gradle Daemon”. After some time, you should see something like the following:

If you see any errors, ensure you’re connected to the robot and that your code doesn’t contain any errors (underlined in red in your code).
We’ve now successfully deployed our code! Now, it’s time to run it! Open up the FRC Driver Station installed in section 0. You should see something like this:
picture of driver station with comms
Ensure “TeleOperated” is selected, and press “enable”. The motor should run. If not, ask a veteran member for help.
Congratulations! You’ve written and deployed your first code!